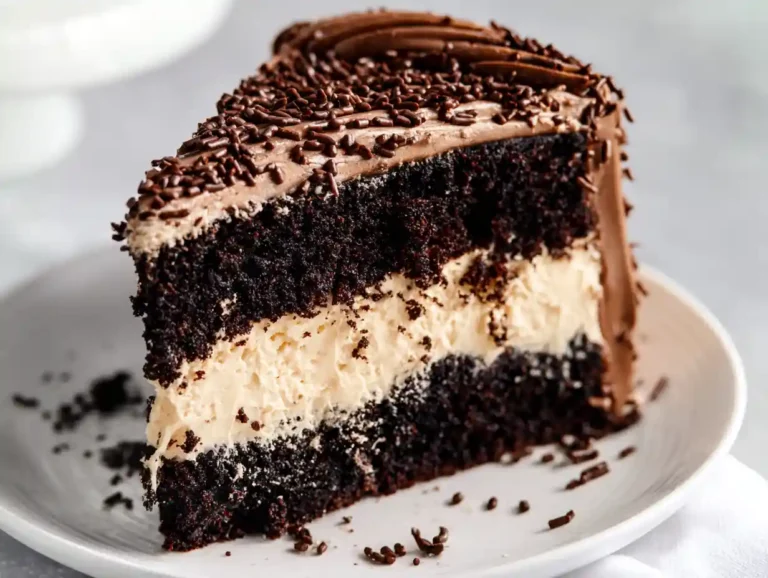
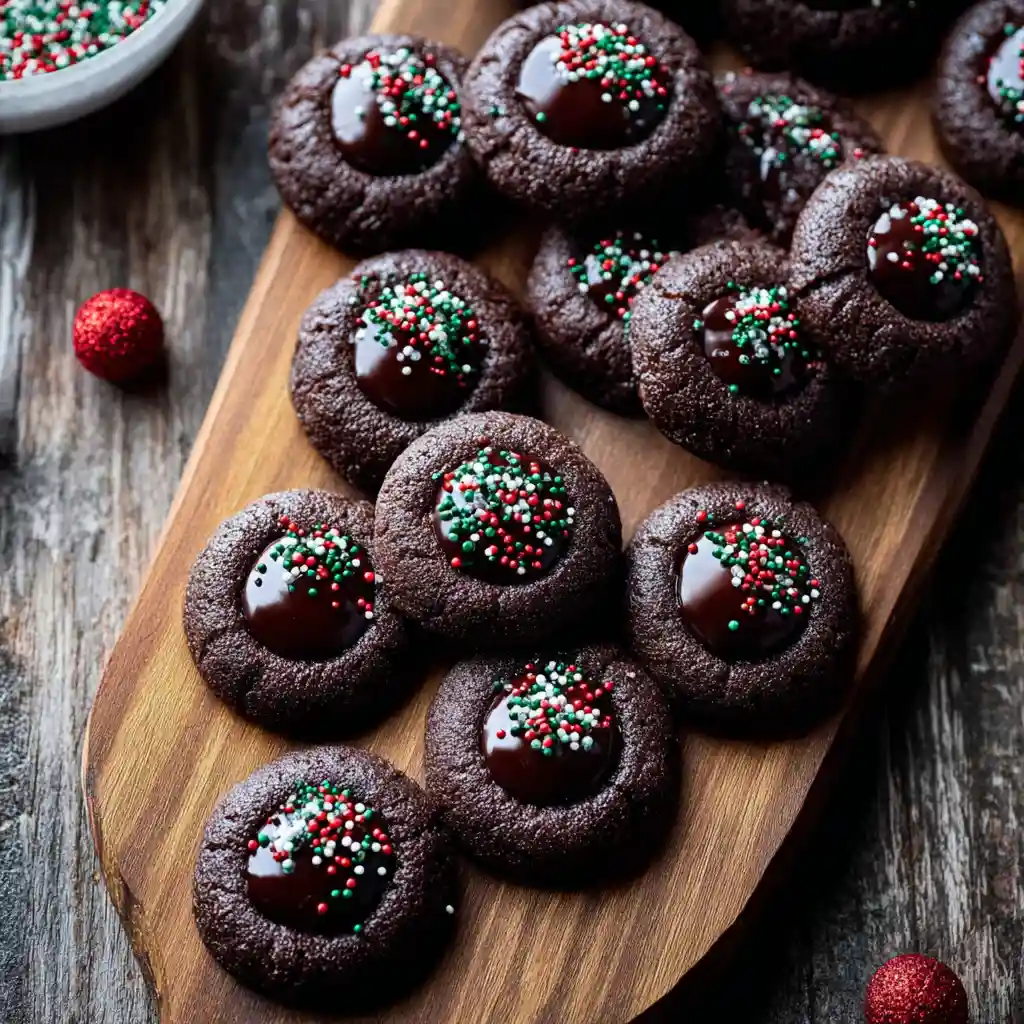
Chocolate Thumbprint Cookies: that phrase alone conjures up the warmest memories for me, and I bet it does for you, too! These little bites of chocolatey goodness are surprisingly easy to make, and they’re always a crowd-pleaser. From prepping the dough to the final flourish of sprinkles, the whole process takes just over two hours, including chill time, but trust me, every minute is worth it!
Table of Contents

Amazing Chocolate Thumbprint Cookies Recipe
Ingredients
Equipment
Method
- Line two baking sheets with parchment paper and set aside.
- Add flour, cocoa powder, salt and baking powder to a medium sized bowl. Whisk to combine, then set aside.
- Add butter, brown sugar and granulated white sugar to a large bowl. Cream together with an electric mixer for two minutes.
- Add the egg yolks and vanilla to the butter/sugar mixture and mix until pale in color and fluffy, 1-2 minutes.
- Add in the dry ingredients and mix just until combined.
- Scoop the dough into 34 portions, then roll into balls. (About 1 tablespoon of dough.)
- Transfer the dough to the baking sheets.
- Using a 1/4 tsp, press down on the dough balls to create an indent.
- Chill the prepared indented dough balls for at least one hour. (You can chill all the dough together on one baking sheet and then separate it out on multiple baking sheets when ready to bake.)
- Preheat the oven to 350 degrees.
- Arrange the prepared dough about 1 1/2 inches apart on the baking sheets.
- Bake the cookies for 9-11 minutes. (I think 10 minutes is perfect.)
- When the cookies are done baking, lightly press down on the centers again with a 1/4 tsp. (They may have lost their indent a little as they baked.) Go around them in a circular motion with a circular cookie cutter/biscuit cutter while they are still hot to give them a perfect circular shape, and to get them back to their original smaller size.
- Then let the cookies cool on the baking sheet for 5 minutes. Transfer them to a cooling rack to completely cool.
- Add the chocolate chips to a small bowl.
- Heat the heavy cream in the microwave, or on the stove, until just about boiling.
- Pour the heavy cream over the chocolate chips and let sit for 1 minute.
- Stir to combine the cream and chocolate together.
- Fill each well of the cookies with about 1 tsp of ganache, more if it'll fit.
- Sprinkle sprinkles over the cookies if you wish.
- Chill the cookies in the fridge for 10-15 minutes to allow the ganache to set.
- Store left overs in an air tight container for up to three days.
Notes
Tried this recipe?
Let us know how it was!Why You’ll Love These Chocolate Thumbprint Cookies
I truly believe baking should be a joyful experience, and these Chocolate Thumbprint Cookies are designed to bring a smile to your face. Here’s why I think you’ll absolutely adore them:
- The rich, chocolatey aroma that fills your kitchen as they bake; pure bliss!
- The perfect balance of a soft, melt-in-your-mouth cookie and a decadent, smooth ganache.
- A simple recipe that brings back childhood memories with every bite.
- They’re perfect for any occasion, from a cozy night in to a festive holiday gathering.
What Makes These the Best Chocolate Thumbprint Cookies?
What sets my Chocolate Thumbprint Cookies apart? I’ve honed this recipe to be foolproof and absolutely delicious. I’m sharing all my secrets to get them perfect every single time.
- No-Fail Ganache: My easy recipe guarantees a smooth, glossy finish that’s never grainy.
- Perfectly Soft Texture: Thanks to a simple chilling trick, these cookies are never dry or crumbly, just perfectly soft and tender.
- Deep Chocolate Flavor: I use Dutch-processed cocoa powder to give these cookies an intensely rich and satisfying chocolate taste.
- Perfectly shaped: A simple trick involving a biscuit cutter to help reshape the cookies after they bake.
Ingredients for Chocolate Thumbprint Cookies
Ready to get started? Here’s everything you’ll need to make these irresistible Chocolate Thumbprint Cookies. I’ve broken it down into two simple lists: one for the cookie dough and one for that luscious ganache.
Cookie Dough Ingredients:
- 1 1/2 cups (188 g) all-purpose flour, spooned and leveled (see notes)
- 1/2 cup (40 g) cocoa powder (Dutch process)
- 1/2 tsp salt
- 1/2 tsp baking powder
- 3/4 cup (168 g) unsalted butter, softened
- 3/4 cup (165 g) light brown sugar, packed
- 1/4 cup (50 g) granulated white sugar
- 2 egg yolks, at room temperature
- 1 1/2 tsp vanilla bean paste or extract
Chocolate Ganache Ingredients:
- 1 cup (200 g) semi-sweet chocolate chips
- 1/2 cup (120 ml) heavy whipping cream
- nonpareils for sprinkling on top (optional)
Ingredient Deep Dive: Key to Perfect Chocolate Thumbprint Cookies
Let’s talk ingredients! It’s important to understand why I use specific ingredients in this recipe. For example, I prefer Dutch-processed cocoa powder in these cookies. Dutch-processed cocoa has a deeper, less acidic flavor than natural cocoa powder, giving these cookies a richer chocolate taste.
The egg yolks are another key element. They add richness and tenderness to the cookies, creating that soft, melt-in-your-mouth texture. Finally, be sure to measure your flour accurately, spooning and leveling it for the best results. For more insights into achieving the perfect cookie texture, you can explore ultimate guide to chocolate chip cookies.
Step-by-Step Instructions for Chocolate Thumbprint Cookies
Here’s a simple step-by-step guide to making these Chocolate Thumbprint Cookies! I’ve made sure the instructions are clear and easy to follow, so you can bake with confidence.
- Line two baking sheets with parchment paper and set aside.
- Add flour, cocoa powder, salt and baking powder to a medium sized bowl. Whisk to combine, then set aside.
- Add butter, brown sugar and granulated white sugar to a large bowl. Cream together with an electric mixer for two minutes.
- Add the egg yolks and vanilla to the butter/sugar mixture and mix until pale in color and fluffy, 1-2 minutes.
- Add in the dry ingredients and mix just until combined.
- Scoop the dough into 34 portions, then roll into balls. (About 1 tablespoon of dough.)
- Transfer the dough to the baking sheets.
- Using a 1/4 tsp, press down on the dough balls to create an indent.
- Chill the prepared indented dough balls for at least one hour. (You can chill all the dough together on one baking sheet and then separate it out on multiple baking sheets when ready to bake.)
- Preheat the oven to 350 degrees.
- Arrange the prepared dough about 1 1/2 inches apart on the baking sheets.
- Bake the cookies for 9-11 minutes. (I think 10 minutes is perfect.)
- When the cookies are done baking, lightly press down on the centers again with a 1/4 tsp. (They may have lost their indent a little as they baked.) Go around them in a circular motion with a circular cookie cutter/biscuit cutter while they are still hot to give them a perfect circular shape, and to get them back to their original smaller size.
- Then let the cookies cool on the baking sheet for 5 minutes. Transfer them to a cooling rack to completely cool.
- Add the chocolate chips to a small bowl.
- Heat the heavy cream in the microwave, or on the stove, until just about boiling.
- Pour the heavy cream over the chocolate chips and let sit for 1 minute.
- Stir to combine the cream and chocolate together.
- Fill each well of the cookies with about 1 tsp of ganache, more if it’ll fit.
- Sprinkle sprinkles over the cookies if you wish.
- Chill the cookies in the fridge for 10-15 minutes to allow the ganache to set.
- Store left overs in an air tight container for up to three days.
Baking Tips for Perfect Chocolate Thumbprint Cookies
Here are a few of my favorite tips for getting these cookies just right. They’re all tried and true methods that will help you to avoid common baking mishaps!
- Chill the dough: Chilling the dough is crucial because it prevents the cookies from spreading too thin in the oven. Cold dough holds its shape better, resulting in a thicker, softer cookie.
- Measure flour accurately: Too much flour can make the cookies dry, so be sure to spoon and level your flour when measuring.
- Don’t overbake: Overbaking will result in dry, crumbly cookies. Bake just until the edges are set and the centers are still slightly soft. I find 10 minutes to be perfect.
Flavor Variations for Your Chocolate Thumbprint Cookies
Want to mix things up? Here are a few alternative filling ideas to customize your Chocolate Thumbprint Cookies! Get creative and make them your own!
| Filling | Ingredient Changes | Notes |
|---|---|---|
| Salted Caramel | Substitute chocolate chips with caramel bits, add salt | Use a high-quality caramel sauce for filling. |
| Peanut Butter | Substitute chocolate chips with peanut butter chips | Drizzle melted chocolate on top for a chocolate-peanut butter combo. |
| Raspberry Jam | Omit ganache ingredients | Use seedless raspberry jam for a smooth texture. |
| Espresso Ganache | Add 1 tsp espresso powder to heavy cream | Enhances the chocolate flavor with a coffee kick. |
Make-Ahead Instructions
Yes, you can absolutely make the dough in advance! Simply wrap it tightly in plastic wrap and store it in the refrigerator for up to two days. You can also make the ganache ahead of time and store it in an airtight container in the refrigerator for up to three days.
Before using, bring the ganache to room temperature and stir until smooth.
How to Store Chocolate Thumbprint Cookies
To keep your Chocolate Thumbprint Cookies fresh, store them in an airtight container at room temperature for up to three days. For longer storage, you can freeze the cookies for up to two months. Thaw them completely before serving.
Troubleshooting: Common Problems and Solutions for Chocolate Thumbprint Cookies
Sometimes baking doesn’t go exactly as planned. Here are some solutions to common issues.
- Why are my cookies spreading? The dough may be too warm. Make sure you chill the dough for at least an hour before baking.
- Why is my ganache grainy? The heavy cream may have been too hot when added to the chocolate. Heat the cream until just about boiling, then let it sit for a minute before stirring.
- My dough is too sticky/dry? Too sticky means there might be too little flour, too dry suggests too much. Add flour/water one tablespoon at a time until the dough reaches the right consistency.
Dietary Adaptations
For a gluten-free version, substitute the all-purpose flour with a gluten-free all-purpose flour blend. For a vegan version, use a plant-based butter substitute, flax eggs, and dairy-free chocolate chips and cream. To reduce the sugar, use a sugar substitute or reduce the amount of sugar in the recipe.
Baking Chocolate Thumbprint Cookies at High Altitude
At high altitude, you may need to adjust the baking time and temperature. Try reducing the baking temperature by 25 degrees and shortening the baking time by a few minutes. You may also need to add a tablespoon or two of flour to the dough.
Equipment Recommendations
While you can mix the dough by hand, I find that an electric mixer makes the job much easier. A handheld mixer works great for this recipe, but a stand mixer is even better. I also recommend using a good quality baking sheet and parchment paper to prevent the cookies from sticking.
For more information on achieving a soft and chewy cookie texture, explore soft and chewy chocolate cookies.
Decoration Ideas for Chocolate Thumbprint Cookies
Beyond sprinkles, there are lots of fun ways to decorate these cookies! Try creating a marbled ganache effect by swirling white chocolate ganache into the dark chocolate ganache. You can also use edible glitter for a touch of sparkle, or drizzle melted chocolate over the cookies for an elegant look.
Frequently Asked Questions
I’ve rounded up some of the most common questions I get about these cookies. Hopefully, I can answer anything that’s still on your mind!
Is it necessary to chill the dough?
Yes, chilling the dough is essential for preventing the cookies from spreading too much.
Why did my cookies lose their indentation?
The cookies may have spread a bit during baking. Gently press down on the centers again with a 1/4 tsp immediately after baking.
How can I make the cookies more crumbly?
These cookies are meant to be soft, but you can try using slightly less butter or baking them for a minute or two longer for a more crumbly texture.
Can I use a different type of chocolate for the ganache?
Absolutely! Milk chocolate or dark chocolate would both work well.
How to store these chocolate thumbprint cookies?
Store them in an airtight container at room temperature for up to three days.
Why are my cookies spreading?
Make sure you chill the dough for at least an hour, and don’t skip the parchment paper.
Why is my ganache grainy?
Make sure the heavy cream is not too hot when you add it to the chocolate.
My dough is too sticky/dry.
If the dough is too sticky, add a tablespoon of flour at a time. If it’s too dry, add a teaspoon of water or milk at a time.
Conclusion
These Chocolate Thumbprint Cookies are a guaranteed hit, whether you’re baking for a special occasion or simply craving a sweet treat. I hope you’ll give this recipe a try and experience the joy of creating these delicious cookies in your own kitchen.
I would absolutely love to know what you think! Leave a comment below to share your results, ask any questions you might have, or let me know what variations you tried. Happy baking!