I’ll never forget my aunt’s holiday parties. The house would be buzzing, but I always made a beeline for the appetizer table, where the star of the show was always a glorious cheese ball. There’s something so wonderfully retro and comforting about it.
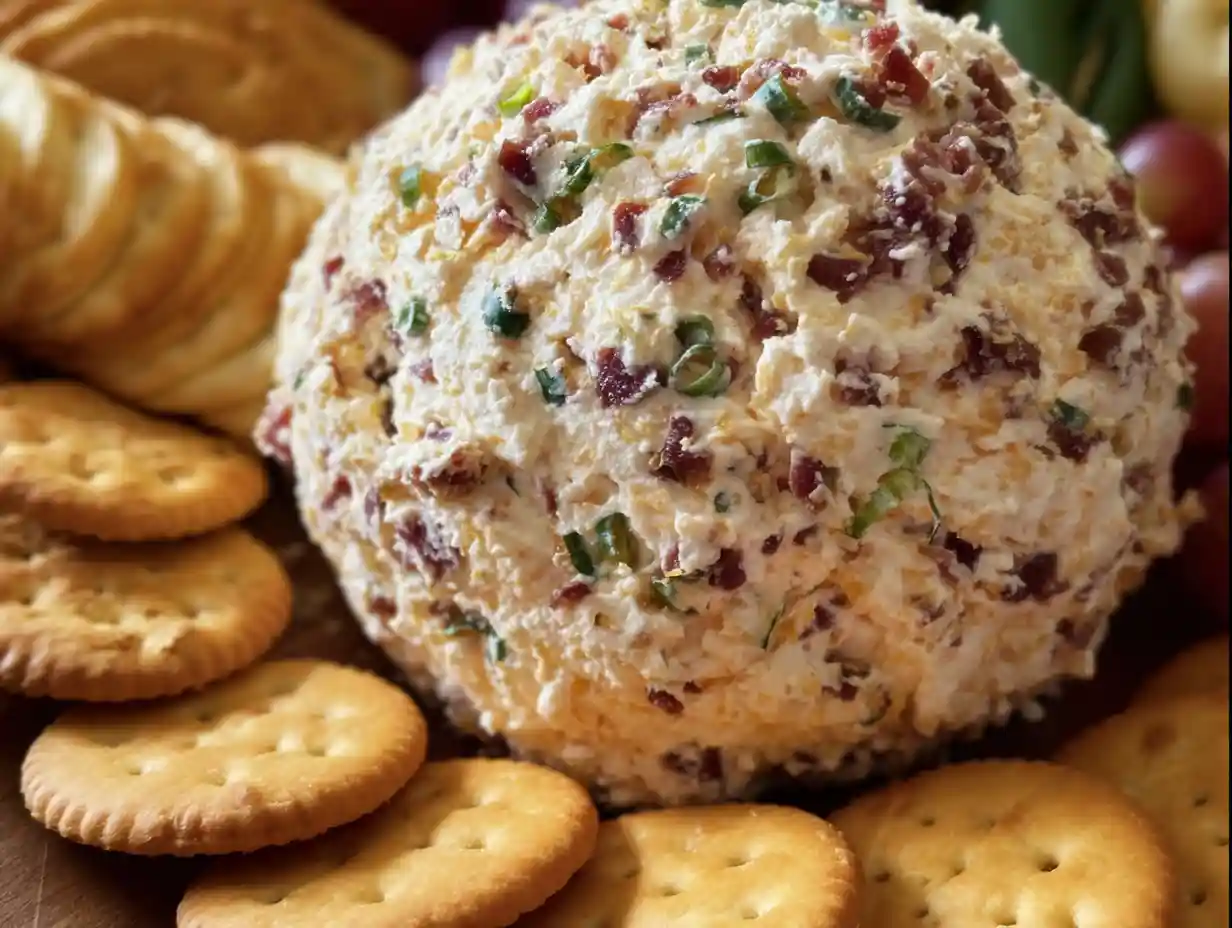
This is my take on that classic, a Dried Beef Cheese Ball that’s incredibly savory, surprisingly easy, and always the first thing to disappear. I promise, this is the only guide you’ll ever need.
Table of Contents
Amazing Dried Beef Cheese Ball Recipe
Ingredients
Equipment
Method
- Place 16 ounces (2 blocks) cream cheese, softened to room temperature, 1 Tablespoon Worcestershire sauce, 1/2 teaspoon black pepper, 1/4 teaspoon garlic powder and 1/4 teaspoon onion powder into a large bowl. Mix well with an electric hand mixer until smooth.
- Add ¾ of the dried beef, ¾ of the green onions, and ¾ of the cheddar cheese. Fold the ingredients in until well combined. Taste and add salt, to taste if needed.
- Save the remaining beef, green onions, and cheese in the fridge until you are ready to serve. Make sure you put it into a covered container or Ziploc bag before placing in the refrigerator.
- On a large work surface, lay out 3 large pieces of plastic wrap overlapping each other. Spoon the cheeseball mixture into the center of the plastic wrap.
- Start to fold the edges of the plastic wrap up around the mixture, helping to form it into a ball, and seal well. Place the cheeseball into the fridge for at least 2 hours or up to overnight to set up.
- When you are ready to serve, place the remaining dried beef, green onions, and cheese onto a large plate and mix together.
- Unwrap the cheeseball and place it on the plate, roll it around so the additional ingredients stick to the outside. You will then have to press them in to stick and try to cover as much of the exposed cheeseball as you can, you will have a little leftover topping, but that’s okay.
- Serve immediately with crackers or whatever you would like to serve with it.
Nutrition
Notes
Tried this recipe?
Let us know how it was!Why This Dried Beef Cheese Ball is a Party Classic

There’s a reason this appetizer has stood the test of time. It was a potluck and holiday staple throughout the 70s and 80s, and its nostalgic charm is undeniable. People love it because it hits all the right notes: creamy, salty, and packed with a deeply savory flavor that’s almost addictive.
Beyond the taste, its simplicity is what makes it a true classic. You don’t need any special culinary skills to whip this up, yet it always feels impressive sitting on a platter, much like another party favorite, the best classic southern deviled eggs. It’s a reliable crowd-pleaser that brings a little bit of that old-school, feel-good party vibe to any get-together.
Ingredients for the Perfect Dried Beef Cheese Ball
The magic of this recipe comes from a handful of simple, powerful ingredients working together. While you can find the full list in the recipe card below, let’s talk about the key players.
Choosing the Best Dried Beef
Dried beef, sometimes called chipped beef, is the heart of this recipe. It’s a salt-cured, air-dried beef that’s thinly sliced. You can usually find it in small glass jars in the grocery store, typically near the canned meats like tuna and chicken. Brands like Armour or Hormel are very common and work perfectly. Some grocery delis also carry it, which is another great option.
A Quick Note on Other Key Ingredients
For the best texture, I always recommend using full-fat, block-style cream cheese. It creates a much richer and more stable base than whipped or low-fat versions. Sharp cheddar cheese gives the cheese ball a necessary flavor punch that balances the saltiness of the beef. Finally, fresh green onions add a hint of freshness and a mild, bright bite that cuts through the richness.
Essential Tools You’ll Need
You don’t need much to make this recipe, but a couple of tools make the process a lot smoother.
- Electric Hand Mixer: While you could mix this by hand, I highly recommend an electric mixer. It whips the cream cheese into a perfectly smooth, lump-free base in seconds, something that’s much harder to achieve with just a spoon.
- Large Bowl: You’ll need a good-sized bowl to mix everything without making a mess.
- Plastic Wrap: This is the real secret to a perfectly shaped cheese ball. It allows you to form the mixture into a tight, round ball without getting your hands sticky and messy.
- A Large Plate: For rolling the cheese ball in its final coating.
Ingredients
- 16 ounces (2 blocks) cream cheese, softened to room temperature
- 1 Tablespoon Worcestershire sauce
- 1/2 teaspoon black pepper
- 1/4 teaspoon garlic powder
- 1/4 teaspoon onion powder
- 4.5 ounce jar dried beef, finely chopped ((divided use))
- 4 green onions, thinly sliced (green part only) ((divided use))
- 1 1/2 cups shredded sharp cheddar cheese ((divided use))
- salt, to taste
How to Make a Dried Beef Cheese Ball
- Place 16 ounces (2 blocks) cream cheese, softened to room temperature, 1 Tablespoon Worcestershire sauce, 1/2 teaspoon black pepper, 1/4 teaspoon garlic powder and 1/4 teaspoon onion powder into a large bowl. Mix well with an electric hand mixer until smooth.
- Add ¾ of the dried beef, ¾ of the green onions, and ¾ of the cheddar cheese. Fold the ingredients in until well combined. Taste and add salt, to taste if needed.
- Save the remaining beef, green onions, and cheese in the fridge until you are ready to serve. Make sure you put it into a covered container or Ziploc bag before placing in the refrigerator.
- On a large work surface, lay out 3 large pieces of plastic wrap overlapping each other. Spoon the cheeseball mixture into the center of the plastic wrap.
- Start to fold the edges of the plastic wrap up around the mixture, helping to form it into a ball, and seal well. Place the cheeseball into the fridge for at least 2 hours or up to overnight to set up.
- When you are ready to serve, place the remaining dried beef, green onions, and cheese onto a large plate and mix together.
- Unwrap the cheeseball and place it on the plate, roll it around so the additional ingredients stick to the outside. You will then have to press them in to stick and try to cover as much of the exposed cheeseball as you can, you will have a little leftover topping, but that’s okay.
- Serve immediately with crackers or whatever you would like to serve with it.
Troubleshooting Common Cheese Ball Problems
Why is my cheese ball too soft or sticky to form a ball?
This usually happens if your cream cheese is too warm or if you haven’t chilled the mixture long enough. The best fix is to simply pop the bowl of cheese mixture back into the refrigerator for 30-60 minutes to let it firm up before you try to shape it with the plastic wrap.
My cream cheese mixture is too stiff to mix.
This is a sign your cream cheese wasn’t softened enough before you started. If you’re struggling, let the bowl sit on the counter for another 15-20 minutes to come to room temperature. This will make it much easier to get that perfectly smooth and creamy texture with your mixer.
How do I fix a cheese ball that tastes too salty?
The dried beef is naturally salty, so it’s important to taste the mixture before adding any extra salt. If you’ve already overdone it, you can try to balance it out by mixing in a little more softened cream cheese to dilute the saltiness.
Variations and Customizations
One of the best things about a cheese ball is how easy it is to customize. Here are a few of my favorite ways to add a personal touch.
| Category | Idea | Why It Works |
|---|---|---|
| Flavor Boosters | Smoked paprika or liquid smoke | Adds a delicious, smoky depth that complements the beef. |
| Flavor Boosters | Fresh chives | Provides a milder onion flavor and a pop of fresh green color. |
| Cheese Add-ins | Smoked gouda | Enhances the smoky notes and adds a creamy, nutty flavor. |
| Cheese Add-ins | Pepper jack | Gives the cheese ball a gentle, spicy kick. |
| Creative Coatings | Crushed pretzels or toasted panko | Adds a fantastic crunchy texture to the exterior. |
| Creative Coatings | Everything bagel seasoning | Delivers a savory, garlicky crunch that’s completely irresistible. |
What to Serve With Your Dried Beef Cheese Ball
While this cheese ball is amazing on its own with a few crackers, it can also be the star centerpiece when you create a simple, affordable charcuterie board. The right dipper can take your cheese ball from great to amazing. I like to offer a variety so there’s something for everyone.
Classic Crackers
You can never go wrong with the classics. Their buttery, simple flavor lets the cheese ball shine. My go-tos are always Ritz, Club crackers, and Triscuits.
Sturdy Dippers
For a hearty cheese ball like this, you need dippers that won’t break. Pretzel crisps, sturdy pita chips, and bagel chips are all excellent choices that can handle a generous scoop. Slices of a hearty sourdough focaccia bread also make for a delicious, slightly softer pairing.
Fresh Vegetables
To add some freshness and a healthy crunch, I love serving a platter of crisp veggies. Celery sticks, carrot sticks, colorful bell pepper strips, and thick cucumber slices are all perfect.
Make-Ahead, Storage, and Freezing Guide
This is the perfect make-ahead appetizer, which is a lifesaver for party planning. You can prepare the cheese ball (without the final outer coating) up to 3-4 days in advance. Just keep it tightly wrapped in plastic wrap in the refrigerator, then roll it in the reserved topping just before serving.
Leftovers are a rare but wonderful thing. To store, wrap the cheese ball tightly in plastic wrap and keep it in the fridge for up to 5 days.
You can also freeze it for later. To do this, form the ball and wrap it tightly in plastic wrap, then place it in a freezer-safe bag. Freeze it without the outer coating. When you’re ready to enjoy it, thaw it overnight in the refrigerator. This slow thawing helps maintain the best possible texture. Once thawed, roll it in the fresh coating and serve.
FAQs about Dried Beef Cheese Ball
Can I make this dried beef cheese ball spicy?
Absolutely! To add some heat, I suggest mixing in some finely diced fresh jalapeños (seeds removed for less heat), a pinch of cayenne pepper, or even a dash of your favorite hot sauce into the cream cheese mixture.
Should I rinse the dried beef before using it?
Rinsing is completely optional. Some people rinse the dried beef to reduce its saltiness, which is a great idea if you are sensitive to sodium. If you do rinse it, make sure to pat it very dry with paper towels before chopping it up. I personally don’t find it necessary.
Can I roll the cheese ball in something other than the beef mixture?
Of course! While the beef and cheese coating is classic, this cheese ball is delicious rolled in other things. Finely chopped pecans or walnuts add a lovely nutty flavor and crunch. For extra texture, crushed pretzels are another one of my favorite alternatives.
A Perfect Appetizer for Any Occasion
I truly believe this Dried Beef Cheese Ball is the perfect, no-fuss appetizer. It’s easy to make, packed with flavor, and always brings a smile to people’s faces. It’s a little taste of nostalgia that never gets old.
Now I’d love to hear from you! What’s your favorite cheese ball memory? Do you have any questions about the recipe, or did you try a fun variation? Please leave a comment below and let me know how yours turned out