Welcome to my little corner of the internet! I’m so glad you stopped by. There’s something truly special about having that one perfect appetizer you can always count on, and for me, this is it. This classic Cheese Ball Recipe is my go-to for just about any occasion, from holiday parties to casual game nights with friends. It’s incredibly easy, packed with flavor, and always disappears in minutes.
I believe the best recipes are the ones that bring people together, and this one does just that. It’s a simple, comforting, and delicious appetizer that feels both nostalgic and totally modern. Let’s get into making this crowd-pleasing classic.
Table of Contents

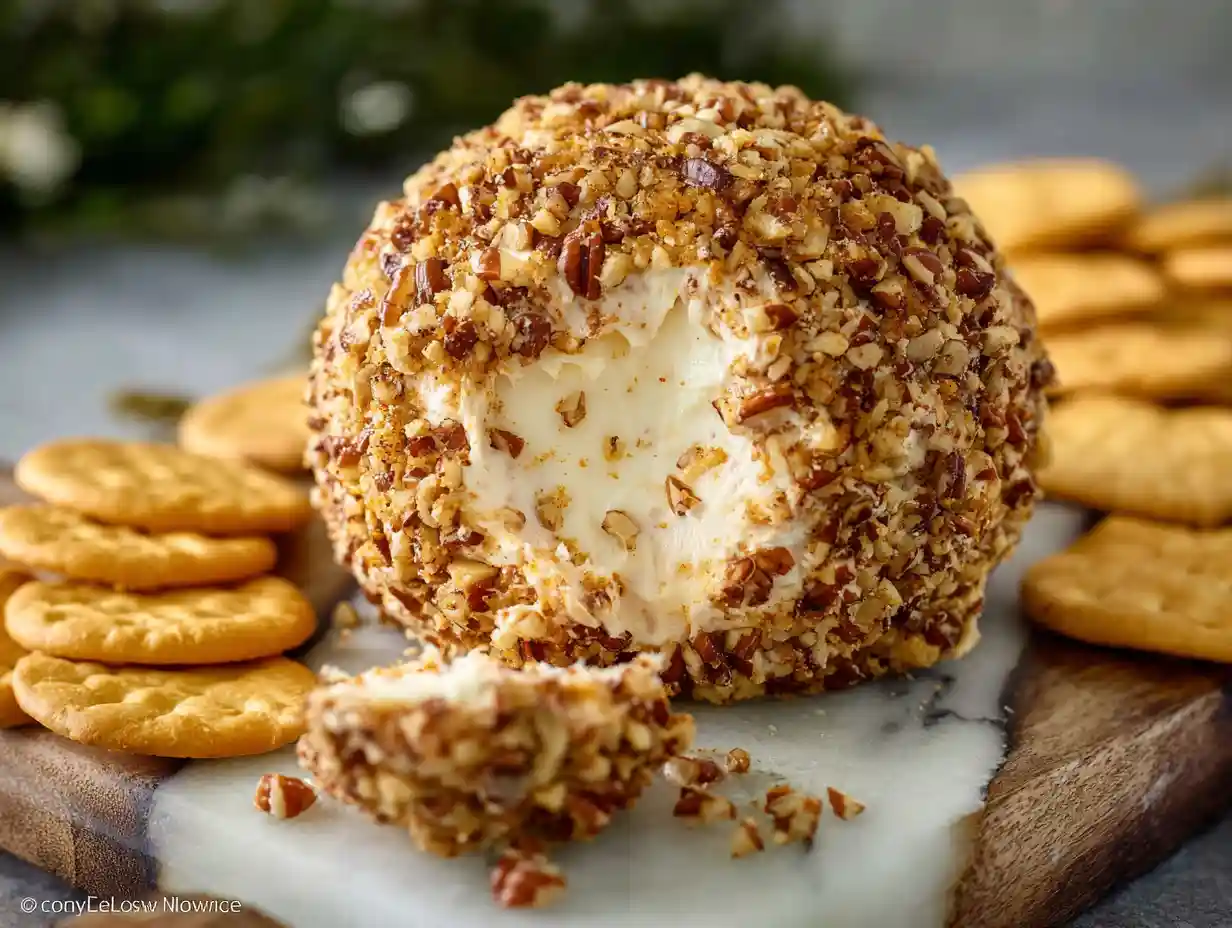
Easy Cheese Ball Recipe
Ingredients
Equipment
Method
- Place the softened cream cheese in a mixing bowl and mix until it’s completely smooth. Add the grated cheddar cheese, chopped green onion, Worcestershire sauce, hot sauce, parsley, garlic powder, oregano, and pepper. Mix everything together until it’s well combined.
- Use a rubber spatula to scrape the sides of the bowl and gather the mixture into one lump. Lightly grease your hands and form the mixture into a round ball.
- Place the finely chopped pecans on a plate. Hold the cheese ball in one hand and use your other hand to scoop the pecans onto the outside of the ball. Press them in gently, turning the ball as you go to coat all the sides completely.
- Cover the cheeseball in cling wrap and refrigerate it for about 1 hour to allow it to firm up. Before serving, remove it from the fridge about 20 minutes ahead of time so it can soften just slightly. Serve with crackers, pretzels, vegetables, or anything else you’d love to dip in cheese!
Nutrition
Notes
Tried this recipe?
Let us know how it was!Why You’ll Love This Easy Cheese Ball Recipe
I find myself coming back to this recipe again and again, and I know you will too. It’s a true kitchen staple for so many reasons.
- Uses Simple Ingredients: You likely have most of what you need already in your pantry and fridge. No complicated or hard-to-find items here!
- Comes Together in Minutes: Seriously, the hands-on prep time is about 15 minutes. The hardest part is just letting it chill.
- A Total Crowd-Pleaser: I have yet to meet someone who doesn’t love a good cheese ball. It’s the first thing to go at every party, much like another classic party appetizer like deviled eggs.
- Incredibly Versatile: You can customize the flavors, coatings, and even the shape to fit any theme or holiday.
Ingredients You’ll Need
The magic of this recipe lies in its simplicity. These straightforward ingredients come together to create something truly delicious. For the best texture, I always recommend letting your cream cheese soften to room temperature so it mixes smoothly. Also, grating your own cheddar cheese makes a world of difference; pre-shredded cheeses have anti-caking agents that can give the cheese ball a slightly grainy texture.
- 16 ounces cream cheese (, softened)
- 2 cups freshly grated sharp cheddar cheese ((avoid pre-shredded cheese))
- 2 green onions (, chopped)
- 1 teaspoon Worcestershire sauce
- 1 teaspoon hot pepper sauce
- 1 teaspoon dried parsley flakes
- 1/2 teaspoon garlic powder
- 1/2 teaspoon Dried oregano
- dash freshly ground black pepper
- 2/3 cup pecans (, finely chopped)
The Best Tools for the Job
You don’t need any fancy equipment to make this recipe, which is part of its charm. An electric mixer, either a stand mixer or a hand mixer, will make whipping the cream cheese and incorporating the ingredients much faster and easier, resulting in a smoother texture. If you don’t have one, a bowl and a sturdy spoon will work just fine with a little extra elbow grease.
I also can’t live without a good rubber spatula for scraping down the sides of the bowl to make sure everything is well combined. Finally, a piece of plastic wrap is your best friend for helping shape the ball and for storing it neatly in the fridge.
How to Make This Classic Cheese Ball Recipe
Ready to see how simple this is? Just follow these steps, and you’ll have a perfect appetizer ready to go.
1. Mix the Cheeseball Ingredients
Place the softened cream cheese in a mixing bowl and mix until it’s completely smooth. Add the grated cheddar cheese, chopped green onion, Worcestershire sauce, hot sauce, parsley, garlic powder, oregano, and pepper. Mix everything together until it’s well combined.
2. Form into a Ball
Use a rubber spatula to scrape the sides of the bowl and gather the mixture into one lump. Lightly grease your hands and form the mixture into a round ball.
3. Coat with Nuts
Place the finely chopped pecans on a plate. Hold the cheese ball in one hand and use your other hand to scoop the pecans onto the outside of the ball. Press them in gently, turning the ball as you go to coat all the sides completely.
4. Chill and Serve
Cover the cheeseball in cling wrap and refrigerate it for about 1 hour to allow it to firm up. Before serving, I like to remove it from the fridge about 20 minutes ahead of time so it can soften just slightly. Serve with crackers, pretzels, vegetables, or anything else you’d love to dip in cheese!
Tips for the Perfect Cheese Ball Every Time
Over the years, I’ve picked up a few little tricks to guarantee my cheese ball turns out perfectly. These simple tips will help you get it right every time.
- Soften the Cream Cheese: This is the most important step! Let the cream cheese sit out on the counter for at least an hour before you start. Room temperature cream cheese mixes into a smooth, creamy base without any lumps.
- Chill Before Shaping: If your cheese mixture feels too soft or sticky to form into a ball, don’t worry. Just cover the mixing bowl and chill it in the refrigerator for about 30 minutes. This will help it firm up enough to handle easily.
- Rest Before Serving: For the best flavor and texture, take the cheese ball out of the fridge about 20-30 minutes before your guests arrive. This allows it to soften just enough to be perfectly scoopable.
For safety, it’s best not to exceed the recommended two hours for cheese at room temperature.
Troubleshooting Common Problems
Even the easiest recipes can sometimes present a little challenge. Here are solutions to a few common issues you might encounter.
Why is my cheese ball too soft to form a ball? This usually happens if the cream cheese was a little too warm or if your kitchen is hot. The fix is simple: cover the bowl with plastic wrap and chill the mixture in the refrigerator for 30-60 minutes. Once it has firmed up, it should be much easier to shape.
Why isn’t my coating sticking? If the pecans or other coatings are falling off, the surface of the cheese ball might be too dry. Try gently pressing the nuts into the surface. If that doesn’t work, you can very lightly dampen your hands with a drop of water and smooth it over the ball before rolling it in the coating.
How can I fix a bland cheese ball? If you’ve tasted the mixture and it feels like it’s missing something, don’t be afraid to adjust the seasonings. A little more hot sauce can add a kick, an extra dash of Worcestershire can deepen the savory flavor, or a pinch of salt can make all the other flavors pop. Taste and adjust until you love it!
Creative Variations for Your Cheese Ball Recipe
One of my favorite things about this recipe is how easy it is to customize. You can swap out just a few ingredients to create a completely new flavor profile. Here are a few of my favorite variations to get you started.
| Flavor Profile | Additions & Swaps |
|---|---|
| Spicy Jalapeño Popper | Omit the oregano and parsley. Add 1/4 cup chopped pickled jalapeños (drained well), 4 slices of crumbled cooked bacon, and use a Mexican cheese blend instead of cheddar. |
| Cranberry & White Cheddar | Swap the sharp cheddar for sharp white cheddar. Add 1/2 cup dried cranberries and use chopped almonds or pistachios for the coating instead of pecans. |
| Italian Herb & Sun-Dried Tomato | Swap the cheddar for a mix of Parmesan and mozzarella. Omit the hot sauce. Add 1/4 cup chopped sun-dried tomatoes (packed in oil, drained) and 1 teaspoon of Italian seasoning. |
Nut-Free Coating Ideas
If you have a nut allergy or simply want to try something different, there are so many wonderful nut-free coatings you can use. They add great texture and flavor.
- Crispy, crumbled bacon bits
- A mix of fresh, finely chopped herbs like parsley, chives, and dill
- Everything bagel seasoning
- Toasted sesame seeds
- Finely crushed pretzels or buttery crackers
Fun Shapes for Special Occasions
Who says a cheese ball has to be a ball? Getting creative with the shape is a fun and simple way to match your appetizer to a specific holiday or event.
- Football: For game day, shape the mixture into an oval and use strips of white cheese (like provolone or mozzarella) to create the laces.
- Pumpkin: For Halloween or Thanksgiving, keep the round shape and use a rubber band to create ridges down the sides. Place a small bell pepper stem on top to complete the look.
- Wreath: For Christmas, form the cheese mixture into a ring shape. You can place a small bowl of raspberry or pepper jam in the center and garnish the wreath with small sprigs of rosemary.
How to Create the Ultimate Cheese Ball Platter
A cheese ball is fantastic on its own, but it truly shines as the centerpiece of a beautiful appetizer platter. Learning how to create a simple, affordable charcuterie board around it is an impressive way to serve it.
Crackers & Breads Offer a variety of textures and flavors. I like to include buttery crackers like Ritz, some hearty seeded crackers or wheat crackers, and thinly sliced, toasted baguette (crostini).
For something extra special, try serving it with slices of homemade sourdough focaccia bread.
Fruits Fresh fruit adds a sweet and juicy contrast to the rich cheese. Grapes, crisp apple slices, and pear slices are all wonderful choices that pair beautifully with cheddar.
Vegetables For a fresh, crunchy element, add some crisp veggies. Celery sticks, colorful bell pepper strips, and cool cucumber slices are perfect for dipping.
Cured Meats To make the platter even more substantial, add a few types of cured meats. Thinly sliced prosciutto, folded salami, or spicy soppressata add a savory, salty bite that complements the cheese perfectly.
Make-Ahead and Storage Instructions
This is the perfect make-ahead appetizer, which is a lifesaver when you’re planning a party. You can prepare the cheese ball, without the nut coating, up to one week in advance. Just wrap it tightly in plastic wrap and store it in the refrigerator.
If you want to store it for longer, you can freeze it! Wrap the uncoated cheese ball in plastic wrap, then add a layer of aluminum foil. It will keep in the freezer for up to one month. When you’re ready to serve it, let it thaw overnight in the refrigerator. For the best texture, I always recommend adding the nut coating right before serving.
Frequently Asked Questions
How do you make mini cheese balls?
To make mini cheese balls, simply divide the cheese mixture into smaller portions (about 1-2 tablespoons each) and roll them into individual balls. Roll each one in your desired coating. They are perfect for serving with toothpicks as bite-sized appetizers.
Can you make a sweet or dessert cheese ball?
Absolutely! The concept is the same. Start with a base of cream cheese and powdered sugar, then mix in things like chocolate chips, toffee bits, or fruit. You can coat it in crushed cookies or nuts and serve it with graham crackers, vanilla wafers, or apple slices.
How long does a cheese ball need to chill?
I recommend chilling it for at least one hour. This gives the flavors time to meld together and allows the ball to firm up properly, making it easier to serve.
What’s the best cheese to use in a cheese ball recipe?
Sharp cheddar is the classic choice and my personal favorite because its bold flavor stands up well to the creamy base. However, you can use other cheeses like Colby, Monterey Jack, sharp white cheddar, or even a smoked Gouda for a different flavor profile.
The Perfect Appetizer for Any Occasion
I truly hope this classic Cheese Ball Recipe becomes one of your go-to favorites, just as it is for me. It’s one of those timeless recipes that proves great food doesn’t have to be complicated. It’s all about simple, delicious ingredients coming together to make something everyone will love.
If you make this recipe, I would be so thrilled to hear about it! Please leave a comment below with your favorite variations or let me know if you have any questions. I love seeing how you make these recipes your own.