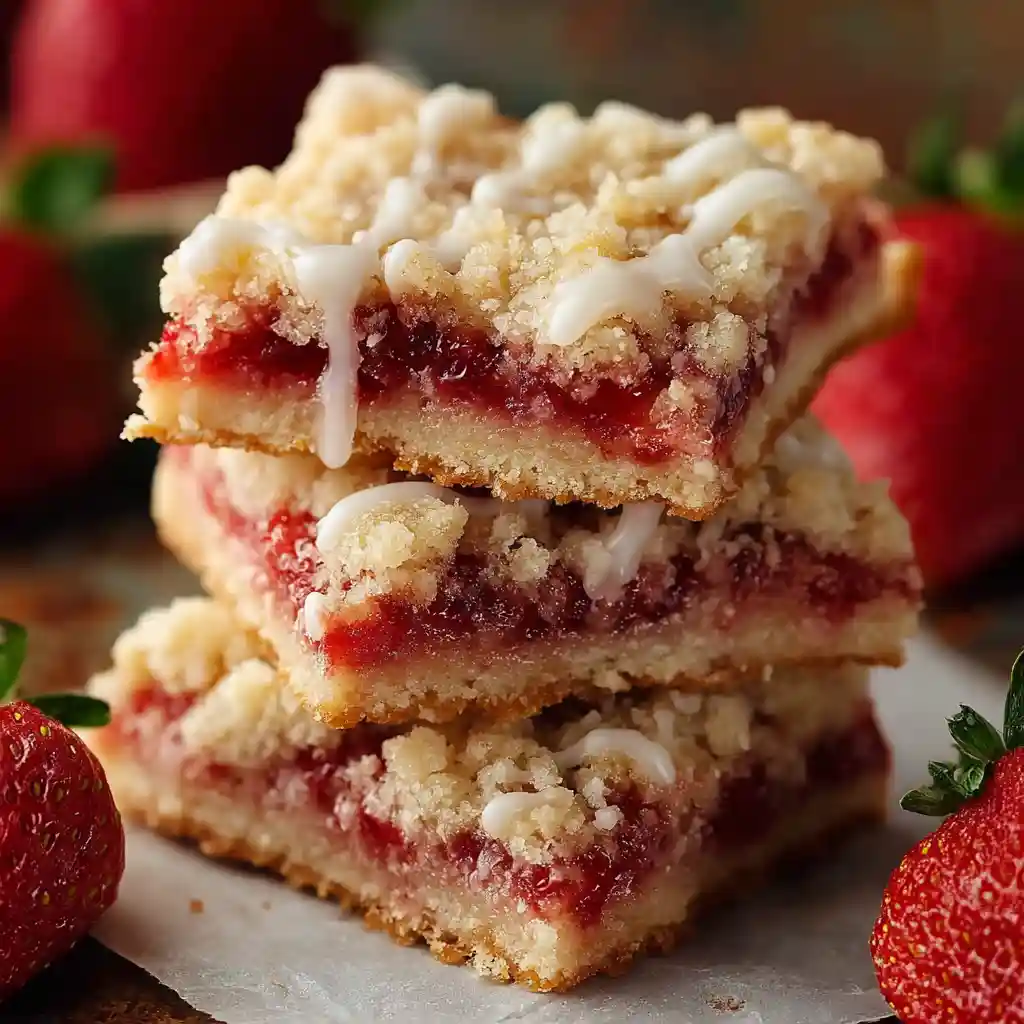
Oh, friends, I am so incredibly excited to share this recipe with you today! I’ve been dreaming of these delightful Strawberry Shortcake Bars with Buttery Crust, and I know you’re going to fall in love with them just as much as I have. They are truly the perfect treat, combining a tender, crumbly crust with a burst of fresh strawberry goodness.
These bars are wonderfully easy to make and disappear quickly, making them ideal for any occasion. From start to finish, you can have these gorgeous Strawberry Shortcake Bars with Buttery Crust ready in approximately 60-75 minutes. Trust me, every minute is worth it for this sweet, fruity dessert.
Table of Contents
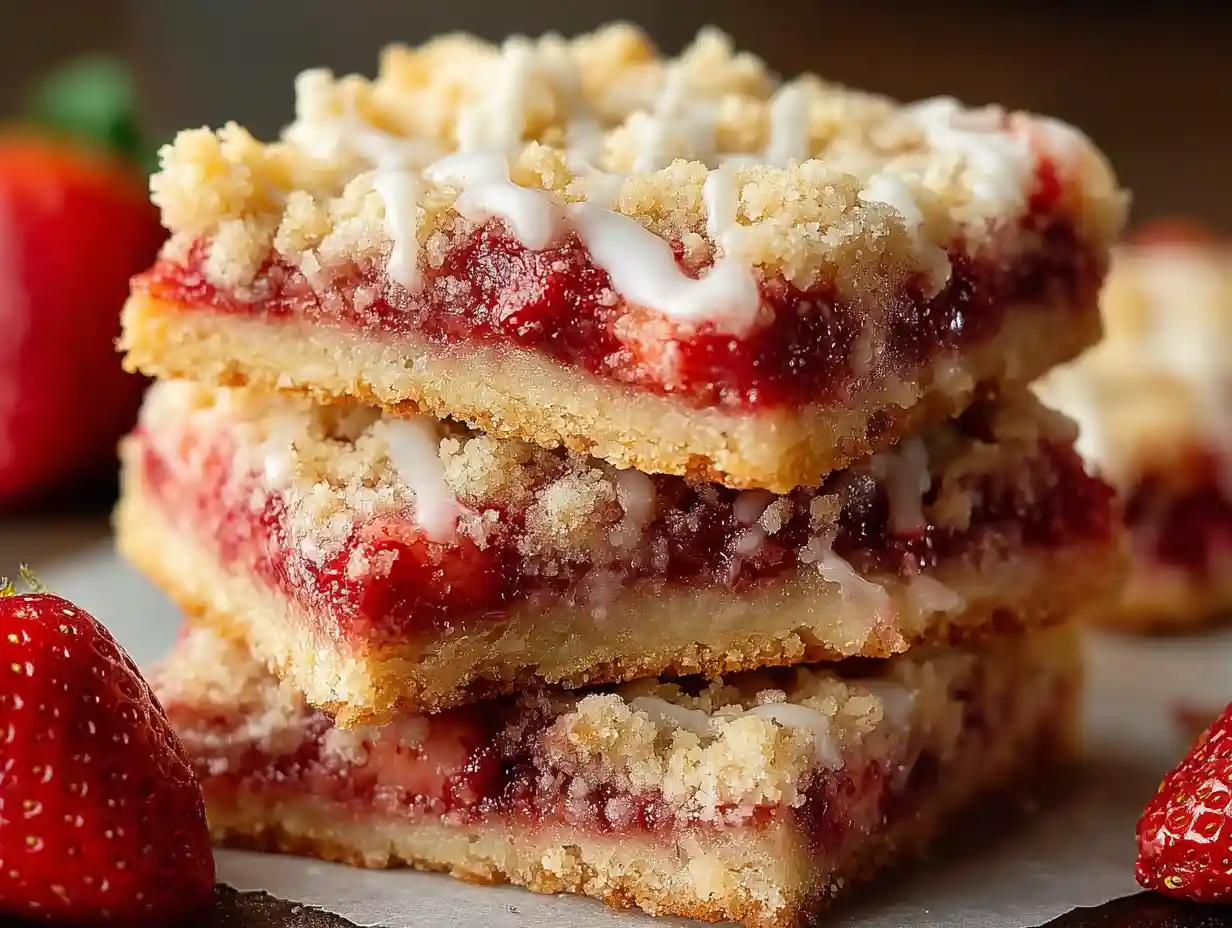
Best Strawberry Shortcake Bars with Buttery Crust
Ingredients
Equipment
Method
- Preheat the oven to 350°F. Line an 8×8-inch square baking pan with parchment paper leaving a 2-inch overhang at each side.
- Make the crust and the crumb topping. Combine flour, both sugars and salt (if you’re using unsalted butter) in a medium bowl and mix to blend evenly so that there are no lumps of brown sugar. Add melted butter and vanilla to the dry ingredients and stir with a spoon until evenly combined, then toss with your fingertips to form large crumbs. Press about two-thirds of this mixture into the prepared pan in an even layer. Use floured hands so that it doesn’t stick and then smooth it over with an offset spatula. Bake the crust for 15-20 minutes until lightly golden then set aside to cool slightly.
- Make the strawberry filling. Combine chopped strawberries, sugar and flour in a medium bowl and toss to combine. Spoon it over the cooled crust in an even layer. Crumble the remaining crust mixture on top so it is evenly dispersed over the strawberries. You won’t cover the strawberries completely – you’ll still see them poking through. Bake for 30-35 minutes until the juices are bubbling and the shortbread crumb topping is golden. Set aside to cool completely in the pan.
- Make the glaze. Combine powdered sugar, cream and vanilla in a small bowl and whisk to combine. Drizzle it over the cooled bars, slice and serve!
Tried this recipe?
Let us know how it was!Why You’ll Love These Strawberry Shortcake Bars with Buttery Crust
I think you’ll find these bars quickly become a favorite in your kitchen for so many reasons:
- Irresistible Buttery Crust: This recipe features a distinct, crumbly shortbread-like crust that forms both the base and a delightful topping. It’s rich, tender, and provides the perfect contrast to the sweet fruit.
- Fresh Strawberry Bliss: I use plenty of juicy, sweet strawberries, creating a vibrant, fruity filling that shines through every bite. It’s truly a taste of summer.
- Simple & Straightforward: Despite their impressive flavor, these bars are incredibly easy to assemble, perfect for bakers of all skill levels. I love how approachable this recipe is.
- Perfectly Portable: These bars are easy to slice and serve, making them wonderful for picnics, potlucks, or a simple dessert at home. They travel beautifully!
What Makes a “Buttery Crust” So Special?
The buttery crust in my Strawberry Shortcake Bars is truly what sets them apart. I’m talking about a rich, tender, shortbread-style base that crumbles delicately with each bite. It’s not a chewy sugar cookie crust or a flaky pastry; instead, it offers a crumbly, melt-in-your-mouth texture that is deeply satisfying.
This crust has a generous amount of butter, giving it a luxurious flavor and ensuring it stays perfectly tender. It provides a beautiful foundation for the sweet strawberry filling. You’ll love how the buttery crumbs create a delightful texture on top too.
Ingredients You’ll Need for the Best Strawberry Shortcake Bars
Gathering these simple ingredients is the first step to creating something truly magical in your kitchen. I’ve found that using quality ingredients makes all the difference!
- 1 ¾ cups (250g) all-purpose flour
- ⅓ cup (65g) granulated sugar
- 3 tbsp (45g) packed light brown sugar
- ¾ cup (170g) salted butter, (melted (or add a pinch of salt if using unsalted butter))
- 1 tsp (5ml) pure vanilla extract
- 3 cups (400g) chopped fresh strawberries
- 2 tbsp (25g) granulated sugar
- 1 tbsp (9g) all-purpose flour
- ½ cup (60g) powdered sugar
- 1 tbsp (15ml) light or heavy whipping cream
- ¼ tsp pure vanilla extract
Ingredient Notes:
- Butter: I love using salted butter in this recipe because it really enhances that rich “buttery crust” flavor. If you only have unsalted butter, don’t worry, just add a pinch of salt to the dry ingredients for the crust.
- Strawberries: For the best possible flavor and texture, I always recommend using fresh, ripe, and fragrant strawberries. They are the star of the show! When chopping them, aim for pieces that are roughly ½-inch to ¾-inch in size, so they hold their shape but still create a delicious, jammy filling. I specifically designed this recipe for fresh strawberries, and I find they yield the best results for this method.
- Sweeteners: Both granulated sugar and light brown sugar play important roles in the crust, contributing to its sweet and slightly caramel-like flavor. The additional granulated sugar in the filling balances the tartness of the strawberries, creating a harmonious sweet and fruity layer.
Essential Equipment for Baking Success
Having the right tools makes baking so much smoother. Here’s what I use for these Strawberry Shortcake Bars:
- 8×8-inch square baking pan
- Parchment paper
- Medium mixing bowls (at least two)
- Whisk
- Measuring cups and spoons
- Offset spatula (or the back of a spoon)
- Cutting board and knife for strawberries
Step-by-Step Instructions to Make Strawberry Shortcake Bars with Buttery Crust
Follow these easy steps, and you’ll have beautiful, delicious Strawberry Shortcake Bars in no time!
- Preheat the oven to 350°F. Line an 8×8-inch square baking pan with parchment paper leaving a 2-inch overhang at each side.
- Make the crust and the crumb topping. Combine flour, both sugars and salt (if you’re using unsalted butter) in a medium bowl and mix to blend evenly so that there are no lumps of brown sugar. Add melted butter and vanilla to the dry ingredients and stir with a spoon until evenly combined, then toss with your fingertips to form large crumbs. Press about two-thirds of this mixture into the prepared pan in an even layer. Use floured hands so that it doesn’t stick and then smooth it over with an offset spatula. Bake the crust for 15-20 minutes until lightly golden then set aside to cool slightly.
- Make the strawberry filling. Combine chopped strawberries, sugar and flour in a medium bowl and toss to combine. Spoon it over the cooled crust in an even layer. Crumble the remaining crust mixture on top so it is evenly dispersed over the strawberries. You won’t cover the strawberries completely – you’ll still see them poking through. Bake for 30-35 minutes until the juices are bubbling and the shortbread crumb topping is golden. Set aside to cool completely in the pan.
- Make the glaze. Combine powdered sugar, cream and vanilla in a small bowl and whisk to combine. Drizzle it over the cooled bars, slice and serve!
Jessy’s Expert Tips for Perfect Strawberry Shortcake Bars
I’ve learned a few tricks along the way to ensure these Strawberry Shortcake Bars turn out perfectly every time. Here are my best tips for you:
- Crust Perfection: When making the crust, be gentle. I find that overworking the dough can lead to a tough crust, and we want that tender, shortbread texture. Once you’ve pressed the base into the pan, make sure it cools slightly before adding the strawberry filling. This helps prevent a soggy bottom.
- Strawberry Filling: The tablespoon of flour I add to the strawberries is my little secret for thickening their juices beautifully, preventing a watery filling. You’ll know the filling is perfectly baked when you see the juices bubbling around the edges and the strawberries look softened but not mushy.
- Cooling is Key: I cannot stress this enough – patience is a virtue here! Letting the bars cool completely in the pan before adding the glaze and slicing is crucial. This step prevents the bars from falling apart, ensures clean, neat slices, and stops the glaze from melting right off.
- Troubleshooting Prevention: The best way to prevent common issues is to follow each step precisely. Pay attention to the details, like cooling times and mixing techniques, and you’ll be set for success!
Pan Size Adjustments & Scaling
This recipe is perfectly designed for an 8×8-inch baking pan, which yields lovely thick bars. If you decide to use a different size, I recommend these general guidelines:
| Pan Size | Notes on Adjustment |
|---|---|
| 8×8 inch | This is the pan size used in my recipe. No adjustments needed for ingredients or baking times provided. |
| 9×9 inch | For a slightly thinner bar, you can use a 9×9 inch pan with the same ingredients. Baking time may be slightly less. |
| 9×13 inch | For a larger batch, I would suggest scaling all ingredients by 1.5 to 2 times for a thicker bar. Baking time will vary. |
When adjusting pan sizes, remember that a larger pan will mean thinner bars and potentially shorter baking times. A smaller pan will mean thicker bars and potentially longer baking times. Always keep an eye on your oven and check for that golden crust and bubbling filling.
Make-Ahead Strategy for Easy Entertaining
I love a good make-ahead option, especially when I’m entertaining! These Strawberry Shortcake Bars are wonderfully flexible:
- Pre-bake the Crust: You can bake the crust layer (Step 2) completely, let it cool, and then wrap it tightly in plastic wrap. It will stay fresh at room temperature for up to 2 days before you assemble the rest of the bars.
- Prepare Strawberry Mixture: You can chop your strawberries and toss them with the sugar and flour (from Step 3) a few hours in advance. Keep them covered in the refrigerator. I wouldn’t recommend making it much further in advance, as the strawberries release their juices.
- Glaze Separately: The powdered sugar glaze can be whisked together and stored in an airtight container in the refrigerator for up to 3 days. Give it a good whisk or add a tiny bit more cream if it thickens too much before drizzling.
- Assemble Later: When you’re ready to serve, simply pull out your pre-baked crust, add the strawberry mixture, crumble the remaining topping, and bake. Once cooled, drizzle with your prepared glaze!
Customizing Your Strawberry Shortcake Bars (Variations & Topping Options)
I always encourage you to get creative in the kitchen! Here are some fun ways I like to customize my Strawberry Shortcake Bars:
| Customization Type | Ideas & Instructions |
|---|---|
| Fruit Variations | Feel free to swap out or combine strawberries with other fresh berries like raspberries, blueberries, or even diced peaches. Just ensure your fruit is chopped similarly to the strawberries for consistent baking. |
| Flavor Enhancements | For an extra zing, I sometimes add a teaspoon of lemon or orange zest to the strawberry filling. You could also try a different extract in the crust or glaze, such as almond extract for a subtle nutty note, or a pinch of ground cardamom for a warm spice twist. |
| Topping Options | Beyond my simple glaze, there are many delicious ways to finish these bars. If you’re pondering “the cream layer debate,” I suggest:
|
Troubleshooting Common Issues
Even experienced bakers run into little hiccups sometimes! Here are some common issues you might encounter with Strawberry Shortcake Bars and my advice on how to fix or prevent them:
- Soggy Crust: This is usually due to not baking the crust long enough in the first step or not allowing it to cool slightly before adding the filling. Ensure your initial crust bake is until lightly golden, and that you allow it to cool as instructed. This creates a barrier against the juicy fruit.
- Runny Filling: If your strawberry filling seems too watery, it’s often because the flour wasn’t adequately mixed in or there wasn’t enough baking time for the juices to thicken. Make sure to thoroughly toss the strawberries with the flour and sugar, and bake until the juices are visibly bubbling.
- Crumbly Topping is Too Fine/Dense: If your topping isn’t crumbly enough, you might have overworked the dough for the crumbs. I suggest using your fingertips to form large crumbs; don’t mix it until it forms a cohesive dough.
- Bars Falling Apart When Sliced: This almost always comes down to not cooling the bars completely. They need time for the filling to set and the crust to firm up. I know it’s hard, but resist the urge to slice them warm!
Storing Your Delicious Bars
Once you’ve baked these lovely bars, I want to make sure you know how to keep them fresh and delicious:
- Room Temperature: If your kitchen is cool, I recommend storing the cooled and glazed Strawberry Shortcake Bars in an airtight container at room temperature for up to 2 days.
- Refrigeration: For longer storage, or if your home is warm, I prefer to keep them in an airtight container in the refrigerator for up to 4-5 days. The texture of the crust remains best when refrigerated.
- Freezing Assembled Bars: You can freeze fully cooled and glazed bars! Wrap individual slices tightly in plastic wrap, then place them in an airtight freezer-safe container or bag. They will keep for up to 1 month. Thaw at room temperature or in the refrigerator before serving.
- Freezing Individual Crusts: You can also pre-bake just the bottom crust, let it cool completely, wrap it tightly, and freeze for up to 1 month. When ready to use, thaw and proceed with the recipe.
Presentation & Serving Suggestions
These Strawberry Shortcake Bars are beautiful on their own, but I love to add a few simple touches to elevate their visual appeal:
- Slicing: For neat, clean slices, I always make sure the bars are completely cool. You can use the parchment paper overhang to lift the entire slab out of the pan, then place it on a cutting board. Use a sharp knife, wiping it clean between cuts.
- Arrangement: Arrange the bars artfully on a serving platter. A stack of them looks wonderful!
- Optional Garnishes: I sometimes sprinkle a tiny bit more powdered sugar over the top just before serving for a delicate finish. A few fresh mint leaves add a pop of color, or a tiny grating of lemon zest over the glaze provides a burst of aroma.
Frequently Asked Questions (FAQ)
Here are some common questions I hear about making these delightful Strawberry Shortcake Bars:
Q: Can I use frozen strawberries instead of fresh?
A: I specifically designed this recipe using fresh strawberries for their optimal texture and flavor. While frozen strawberries can sometimes be used in baking, I recommend fresh for the best results in these bars to avoid excess moisture.
Q: Why do I need to bake the crust separately first?
A: Baking the crust first, also known as blind baking, helps to create a sturdy, slightly golden base. This prevents the crust from becoming soggy once the juicy strawberry filling is added.
Q: My glaze seems too thick/thin. What should I do?
A: If your glaze is too thick, add a tiny splash more cream, about ¼ teaspoon at a time, until it reaches your desired drizzling consistency. If it’s too thin, whisk in a tablespoon more of powdered sugar until it thickens up.
Q: How do I know when the bars are fully baked?
A: You’ll know they are ready when the shortbread crumb topping is golden brown, and the strawberry filling beneath is bubbling around the edges, indicating the fruit has softened and its juices have thickened.